AI Quick SummaryAI
When your iPhone rejects a passcode you know is correct, the cause is usually a temporary iOS glitch, a screen input issue, or a truly forgotten code. Try the safest fixes first before any erase-based path.
- Force restart the iPhone, clean the screen, and retype the passcode slowly to avoid triggering the iPhone Unavailable lockout.
- On iOS 27 or earlier, tap Forgot Passcode within 72 hours of a change to enter your previous code, or use Erase iPhone with your Apple ID.
- If Finder or iTunes recovery restore stalls, a desktop tool such as Tenorshare 4uKey is an advanced fallback; Activation Lock still applies.
“The iPhone rejects a correct passcode, displaying an error despite the input matching the stored credential.” Sometimes it happens after an iOS update, sometimes after a restart, and on newer phones like the iPhone 13 or 15 it can appear out of nowhere. The short answer: it depends—often a temporary glitch, occasionally forgotten input, and rarely a hardware fault. Before repeating attempts and triggering an iPhone Unavailable lockout, stop guessing, force restart once, and try the passcode again slowly on a clean screen.

Why Is My iPhone Not Accepting Passcode Right Now?
If your iPhone says the passcode is incorrect but you are sure it is right, the cause usually falls into one of three buckets: input error, a temporary iOS glitch after an update or reboot, or a real forgotten passcode. Very rarely, a display or logic-board fault registers ghost touches. The safest first move is a force restart plus a careful retype—not repeated fast attempts, which quickly disable the device.
- Input still works, screen is normal: retype slowly; check for a screen protector edge blocking digits.
- Just updated iOS or restarted: force restart once and try again before more attempts.
- Truly forgotten passcode or already showing Unavailable: plan for an erase-and-restore path; there is no no-erase unlock.
Apple's official paths (Erase iPhone on-device, iCloud, or a computer restore) all reset the phone. A previous passcode within 72 hours can help only if you enabled that option before the lockout.
8 Methods to Fix an iPhone Passcode That Won't Work
Work through these in order. The first steps are risk-free; erase-based paths come later and require a backup mindset. Choose based on whether you remember the passcode, whether Find My is on, and whether the device is already disabled.
Method 1: Force Restart, Then Retype Carefully
A stuck iOS process after an update is the most common reason for a suddenly rejected passcode. A force restart clears it without any data loss.
- iPhone 8 and later: press Volume Up, then Volume Down, then hold the Side button until the Apple logo appears.
- iPhone 7/7 Plus: hold Volume Down and the Side button together.
- Wait for full boot, then enter your passcode slowly, one digit at a time.

If the screen has any lag or ghost touches, wipe it clean and remove wet cases before trying again. Do not keep guessing—each wrong entry brings the disabled timer closer.
Method 2: Use the 'Previous Passcode' 72-Hour Option
On iOS 17 and newer, Apple added a Reset Passcode option that accepts your old passcode for 72 hours after a change. This only works if you recently changed the code and are still inside that window.
- On the Enter Passcode screen, keep failing until you see Forgot Passcode? or Passcode Reset.
- Tap it and choose Enter Previous Passcode.
- Type the old passcode and set a new one.
Outside the 72-hour window or on older iOS versions, this option will not appear. Move on to a reset path.
Method 3: Reset From the Lock Screen (Erase iPhone)
If your iPhone is running iOS 27, is showing the iPhone Unavailable or Security Lockout screen, and you know your Apple ID password, you can erase without a computer.
- Keep entering wrong passcodes until Erase iPhone appears in the bottom corner.
- Tap Erase iPhone, then Erase iPhone again to confirm.
- Sign in with your Apple ID password to remove Activation Lock.
- Set up the phone and restore from an iCloud backup if available.
This erases everything on the device. Data not backed up to iCloud or a computer will be lost.
Method 4: Restore Through iCloud (Find My)
If Find My is enabled and the phone is online, you can erase it remotely from another device or a browser.
- Go to iCloud.com/find or open Find My on another Apple device.
- Select the locked iPhone, tap Erase This Device, then confirm with your Apple ID password.
- After the erase completes, set up the iPhone as new or from backup.
This still requires your Apple ID credentials, and Activation Lock remains after the erase. Without the Apple ID password, this method will not proceed.
Method 5: Recovery Mode Restore With a Computer
When the phone is disabled, the Erase button never appears, or Find My is off, a recovery-mode restore through Finder (macOS) or the Apple Devices app / iTunes (Windows) is the standard fallback.
- Connect the iPhone to a computer with a Lightning or USB-C cable.
- Force the phone into recovery mode using the button sequence for your model (hold Side until the recovery cable icon appears).
- In Finder/iTunes, choose Restore when prompted.
- Wait for the firmware to download and install. Do not disconnect.
This wipes all data. If the download takes more than 15 minutes, the phone exits recovery mode and you must repeat the button steps.
Method 6: If Official Reset Paths Fail (Desktop Recovery Tool)
When iTunes times out repeatedly, buttons are broken, the device won't stay in recovery mode, or the computer refuses to detect the iPhone, a dedicated desktop tool can be a practical fallback. Tenorshare 4uKey is one such option built for locked iPhones and iPads when Apple's own path stalls.
When This Approach Fits Your Situation
- You are the device owner and cannot get past the Enter Passcode, iPhone Unavailable, or Security Lockout screen.
- iTunes or Finder repeatedly fails at the restore step or does not recognize the device.
- The Side or Volume buttons are unreliable, making manual recovery mode difficult.
- You want a guided flow with fewer command-line style steps; the process is beginner-friendly on Windows and macOS.
- You accept that removing the lock screen still erases local data, and that Activation Lock remains if Find My was enabled.
Tenorshare 4uKey handles the firmware download and recovery-mode handoff in one flow. It supports current iPhone and iPad models on recent iOS versions. Back up first if you can still access iCloud.com or a prior computer sync.
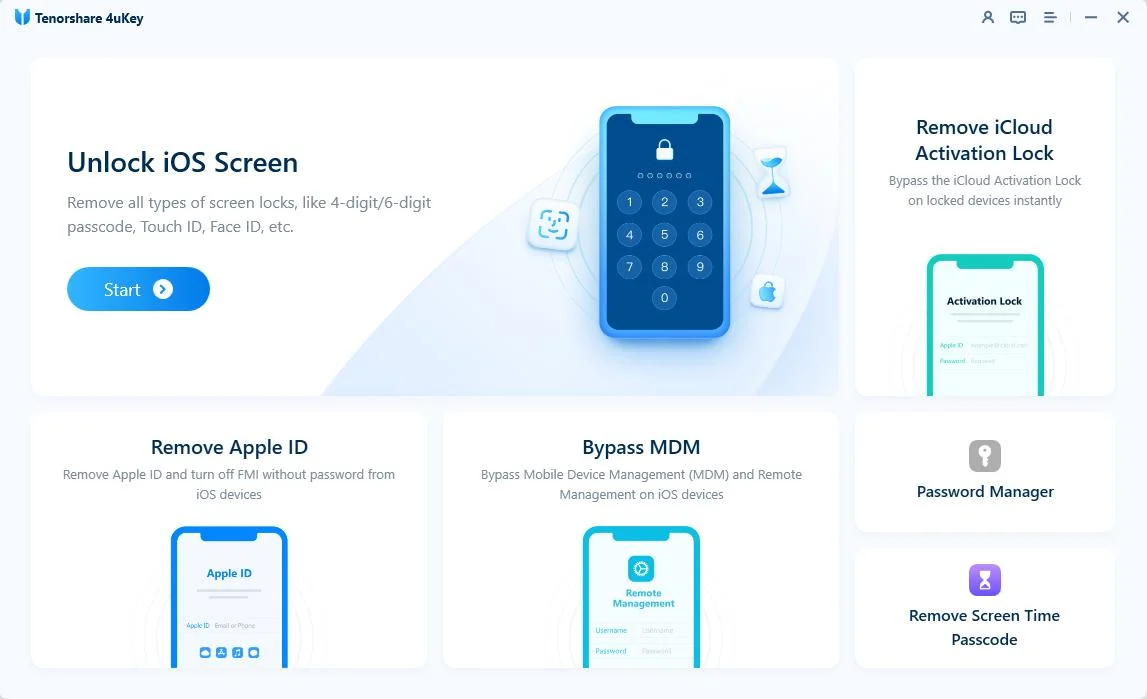
Step 1: Download and install 4uKey
Get 4uKey on your PC or Mac and install it. Open the program and click "Start" to begin removing the lock screen passcode.
Step 2: Connect your iPhone to the computer
Connect your iPhone to the computer with a USB cable. The software will detect the device on its own.
If the program doesn't detect your iPhone, follow the on-screen steps to put it into "Recovery Mode" or "DFU Mode" so 4uKey can pick it up.

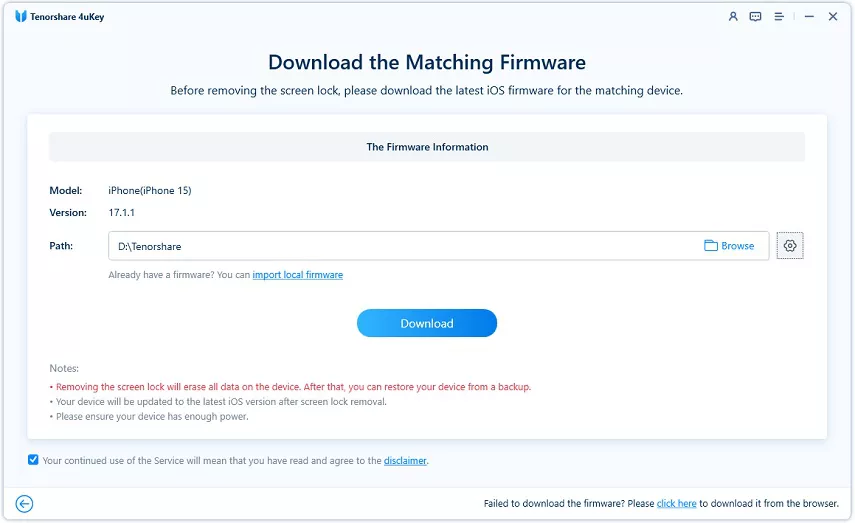
Step 3: Download the firmware package
Next, the program will ask you to download the latest firmware package. Pick a save location and click "Download". Make sure your computer has at least 7GB of free space for the file.
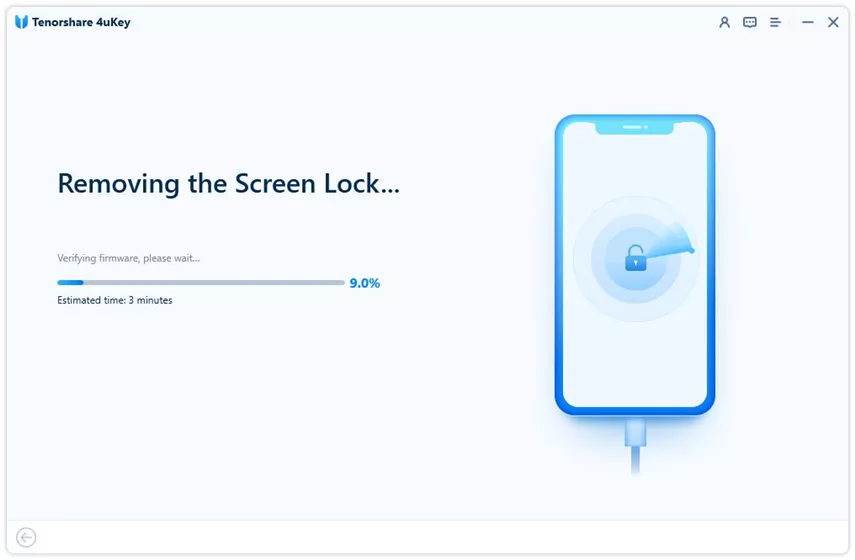
Step 4: Start unlocking the iPhone lock screen
Once the firmware finishes downloading, 4uKey will start removing the iPhone passcode on its own. The job takes a few minutes. Keep the device connected the whole time.
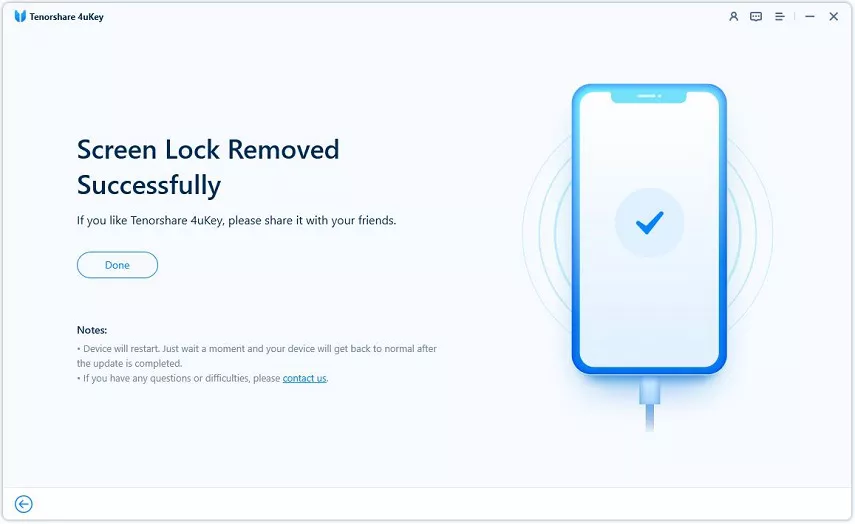
Step 5: Finish and set up your iPhone
After the passcode is removed, you can set up the iPhone as new and add a new passcode, Touch ID, and Face ID. If you have an earlier iTunes or iCloud backup, you can also restore the iPhone from that backup.
Keep in mind: no third-party tool bypasses Activation Lock on a normal passcode reset. After the erase, you will still need your Apple ID password on the setup screen.
Method 7: Check Screen Hardware for Ghost Touches
If the passcode digits register incorrectly or the phone "types" on its own, the issue may not be your memory. Cracked digitizers, poor third-party screen repairs, or a swelling battery can produce phantom taps.
- Remove the case and any screen protector, then dry the screen fully.
- Watch the number pad without touching it—if buttons flash on their own, that is ghost touch.
- Book a Genius Bar or authorized repair visit before more failed attempts push the phone into the Unavailable state.
Hardware faults will not fix themselves with more restarts. Getting the screen checked first can save you a full erase.
Method 8: Contact Apple Support With Proof of Ownership
If you have no backup, no Apple ID password, and the device is second-hand or gifted, Apple Support may help—but only with proof of ownership. Bring the original receipt or invoice showing the serial or IMEI.
- Book an appointment at an Apple Store or authorized service provider.
- Provide proof of purchase and government ID.
- Apple will guide you through Activation Lock removal only if ownership is verified.
Without documentation, Apple cannot bypass Activation Lock, and neither can any legitimate third-party tool.
Match Your Situation to the Right Unlock Path
| Method | Passcode Known | Backup Needed | Find My Required | Data Loss Risk |
| Force Restart + Retype | Yes | No | No | None |
| Previous Passcode (72h) | Old code only | No | No | None |
| Erase iPhone on Lock Screen | No | Recommended | Yes (Apple ID) | Full erase |
| iCloud Find My Erase | No | Recommended | Yes | Full erase |
| Recovery Mode via Computer | No | Recommended | No | Full erase |
| Tenorshare 4uKey | No | Backup recommended | Not required | Varies |
| Apple Support (Proof of Ownership) | No | Optional | N/A | Varies |
Verify the Fix and Protect Your Data After Regaining Access
Once your iPhone accepts a passcode again—old or newly set—do a short verification pass before assuming everything is normal.
- Confirm Face ID or Touch ID still unlocks the phone; re-enroll if it fails.
- Check Settings > General > Software Update and finish any interrupted update.
- Sign back into iCloud, iMessage, and FaceTime; two-factor prompts are normal after a restore.
- Restore from your latest backup only if the fix required an erase. If the restore reintroduces the same bug, set up as new.
- Test banking and authenticator apps early—many require re-verification after a passcode reset.
If the passcode was rejected due to a hardware issue, keep an eye on random touch behavior for the next few days before storing sensitive apps on the device again.
Habits That Keep Your iPhone Passcode Working
Most rejected-passcode scenarios trace back to a handful of avoidable habits. A few small routines cut the risk sharply.
- Enable iCloud Backup and confirm the last backup date every few weeks.
- Keep your Apple ID password saved in a password manager, not only in your head.
- When you change the passcode, keep the previous one memorable for at least 72 hours—iOS accepts it during that window.
- Update iOS on Wi-Fi with the phone charged; interrupted updates are a leading cause of glitchy passcode prompts.
- Use a plain, well-fitting screen protector; edge lifts cause missed digit taps.
- Avoid rapid repeated attempts—if two tries fail, force restart before trying again to avoid the disabled timer.
Getting Back In Without Making Things Worse
Start with the lowest-risk moves: force restart, careful retype, and the 72-hour previous-passcode option when eligible. Move to Erase iPhone on the lock screen or iCloud only when you have your Apple ID password and can afford an erase. Recovery-mode restore through a computer is the standard fallback; a dedicated desktop tool like Tenorshare 4uKey helps when that path stalls. Save Apple Support with proof of ownership for cases where Activation Lock or Apple ID recovery is the real blocker.
Without a valid backup or ownership proof, some data or full access simply cannot be recovered—plan accordingly next time.
FAQ
Q: My iPhone says the passcode is incorrect but I know it is right—what should I do first?
A: Stop entering it repeatedly. Force restart the iPhone, dry and clean the screen, remove any thick screen protector, then retype slowly. If it still fails after two careful attempts, move to a reset path rather than triggering the Unavailable lockout.
Q: Does erasing my iPhone to reset the passcode also remove Activation Lock?
A: No. A passcode reset does not remove Activation Lock. You will still need your Apple ID password (or the previous owner's) at setup. If you cannot provide it, contact Apple Support with proof of purchase; no legitimate third-party tool bypasses Activation Lock on a normal reset.
Q: Will I lose everything if I use recovery mode or a tool like Tenorshare 4uKey?
A: Yes, local data on the device is erased. If you have an iCloud or computer backup, you can restore most content afterward. Without a backup, unsynced photos, notes, and app data cannot be recovered—always check your last backup date before starting.
Q: Why did my passcode stop working right after an iOS update?
A: Interrupted or partially applied updates sometimes leave the SpringBoard or Secure Enclave check in a stuck state. A single force restart usually clears it. If not, connect to a computer and check for a completing update prompt before doing a full restore.
Q: How do I know if the problem is my screen and not my memory?
A: Watch the keypad without touching it—if numbers appear on their own, you have ghost touches from a bad digitizer or swelling battery. In that case, do not keep guessing; visit an authorized repair provider before more failed attempts disable the device.