DNX Fastboot Mode is a low-level startup state seen mostly on Intel-based Android devices when the phone or tablet is waiting for firmware or fastboot communication instead of booting Android normally. Your safest first move is to force-restart the device and confirm whether it returns to DNX before trying any flashing or reset procedure.
The main risk is data loss or device damage if you flash the wrong firmware, interrupt a repair, or use a reset path without a backup.

What Is DNX Fastboot Mode?
DNX Fastboot Mode is a boot-level recovery and flashing environment used on some Intel-based Android devices. DNX usually refers to a download or download-and-execute stage, where the device can wait for a firmware image, bootloader instruction, or fastboot-related command from a computer.
It is not the same as normal Android Recovery Mode. Recovery Mode usually lets you wipe cache, factory reset, or apply an update from a visible menu. DNX Fastboot Mode appears earlier in the boot chain and is closer to firmware repair, which is why the screen may show a message such as DNX Fastboot Mode or waiting for fastboot command.
It is also not identical to standard Fastboot Mode on every Android phone. Many Qualcomm or MediaTek devices use a regular fastboot screen, while DNX is more commonly associated with Intel Android platforms, older tablets, and some brand-specific firmware recovery flows.
- Use DNX context when: the screen specifically says DNX, the device does not reach Android, and a computer sees it as a low-level device.
- Use standard recovery context when: you can open an Android Recovery menu with wipe and update options.
- Use normal fastboot context when: the bootloader screen accepts common fastboot commands and the device is listed correctly by platform tools.
How to Recognize DNX Fastboot Mode
The clearest sign is the device screen. You may see text similar to DNX Fastboot Mode, waiting for fastboot command, or a bootloader-style message that stays on-screen after a failed startup.

Next, check how the device behaves after a power cycle. Hold the Power button long enough to shut it down, then start it again without pressing volume keys. If it immediately returns to DNX, the issue is more likely a boot, firmware, button, or storage problem than a one-time accidental key press.
On Windows, connect the device with a known-good USB cable and open Device Manager. A healthy driver setup may show an Android, Intel, fastboot, bootloader, or OEM-specific device entry. If you see an unknown device, a yellow warning icon, or repeated connect-disconnect sounds, the computer may not have the right driver or the USB connection may be unstable.

- Screen says DNX and does not change: treat it as a firmware-level boot state.
- DNX appears only while holding buttons: check whether a volume key is stuck or being pressed by a case.
- Computer cannot identify the device: test another USB port, cable, and driver package before flashing.
- DNX returns after every restart: prepare for recovery, reset, or OEM firmware repair.
Why Does DNX Fastboot Mode Appear?
DNX Fastboot Mode can appear for simple or serious reasons. The cause matters because a forced restart may be enough for an accidental trigger, while firmware corruption can require a full repair.
- Accidental key combination: pressing Power with a volume key during startup may trigger a bootloader or DNX state on supported devices.
- Stuck hardware button: a jammed volume button can force the device into a boot mode every time it starts.
- Interrupted system update: losing power or disconnecting during firmware installation can leave the boot or system partition incomplete.
- Damaged boot or system partitions: failed rooting, failed flashing, storage errors, or incompatible images can prevent normal Android startup.
- Bad USB connection: an unstable cable or hub can break communication during a repair attempt.
- Missing drivers: Windows may detect the device incorrectly, so fastboot or OEM tools cannot communicate with it.
- Wrong firmware package: flashing firmware for a different model, region, storage size, or board revision can keep the device stuck or make it worse.
If the device contains data you cannot replace, stop before flashing. Low-level firmware repair often erases data, and a device that cannot boot may not allow a normal backup.
How to Enter and Exit DNX Mode
Before you try a repair, decide which path fits your situation. This quick triage helps you avoid using a firmware tool when the problem is only a forced boot mode or a cable issue.
- Does DNX disappear after a long Power-button restart? Use the device normally and watch for a stuck button or failing battery.
- Does DNX return only when a case or volume key is pressed? Remove the case and inspect the buttons before software repair.
- Does Windows show an unknown device? Fix drivers, USB cable, and port recognition before running fastboot or OEM tools.
- Did DNX appear after a failed update or flash? Use the exact OEM firmware package for your model if you proceed.
- Is the device locked and you are trying to reset access? Use official account recovery or a guided reset/unlock workflow only if you own or are authorized to service the device.
- Is the data more valuable than the device? Do not flash; consult a repair technician with board-level or data-recovery experience.
Entering DNX Mode Intentionally
- Power the Android device off completely. If the screen is frozen, hold Power until it shuts down.
- Disconnect USB accessories, memory cards, and adapters unless your device model specifically requires USB connection for DNX entry.
- Press and hold the boot-key combination used by your model. On many Intel Android devices this involves Power plus a Volume key, but the exact combination varies by brand and board.
- Release the buttons when the DNX or bootloader message appears.
Entering DNX manually should not erase data by itself. The risk starts when you send flashing commands, wipe partitions, or load firmware images.
Exiting DNX Mode Safely
- Hold the Power button for 10 to 20 seconds until the screen turns off.
- Wait a few seconds so the device fully powers down.
- Start it again with only the Power button, keeping your fingers away from volume keys.
- If the device boots Android, check for stuck buttons and avoid interrupting pending system updates.
- If it returns to DNX, disconnect USB and try one more forced restart.
- If DNX still returns, move to driver checks, firmware repair, or a guided reset path depending on your situation.
- If the device becomes completely unresponsive, stop repeated attempts and charge it with the original charger before further diagnosis.
A forced restart is the lowest-risk fix. It does not repair corrupted firmware, but it can clear an accidental DNX state without wiping the device.
Fix Entering DNX Mode Waiting for Fastboot Command
Use this option only when the DNX problem is part of an access or reset workflow on an Android device you own or are authorized to unlock. Tenorshare 4ukey for android is a guided Android screen-lock removal tool, not an Intel DNX firmware flasher, so it should not be treated as a replacement for OEM firmware repair when the bootloader or partitions are damaged.
This route is best suited when your device can still follow a reset or recovery-guided process and the main barrier is the Android screen lock. It may erase the device during lock removal, and after a reset Android may still ask for the previously synced Google account because Factory Reset Protection is separate from a screen lock.
- Best fit: a locked Android device where you need a guided screen-lock removal and reset workflow.
- Requirement: a Windows or Mac computer, a stable USB cable, and physical access to the device.
- Data impact: lock removal commonly wipes user data; do not continue if you need unrecovered files from the device.
- When it fails: the device cannot stay powered, cannot be detected by USB, has incompatible firmware damage, or is blocked by account verification after reset.

First, download and install Tenorshare Android Unlocker on your computer. Use it with 4uKey for Android when you need to unlock an Android device screen.
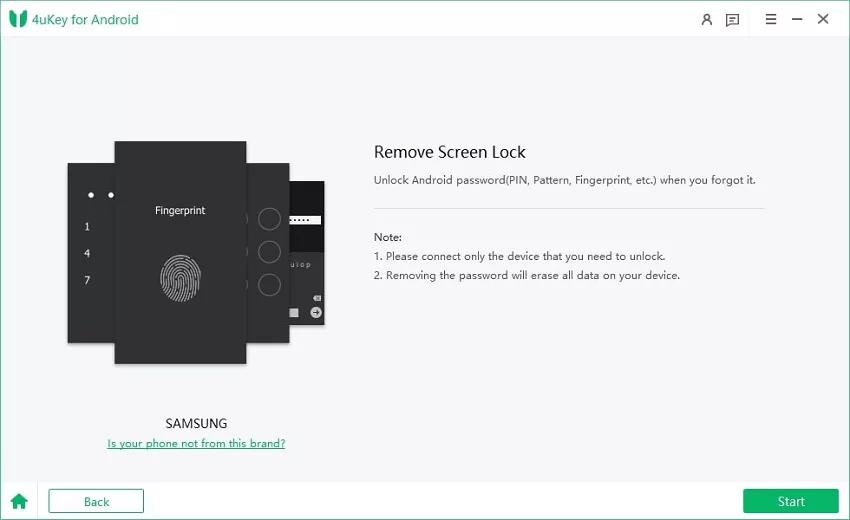
Launch the program and choose the "Remove Screen Lock" feature.

Choose the brand of your device to start the unlocking process.
Step 1: Choose Remove Screen Lock
For other Samsung devices, choose the “Clear device data” option. For non-Samsung Android devices, select the device brand and click "Start" to begin. The software will detect the device brand automatically. If it shows the wrong brand, click “Is your phone not from this brand?”, choose the correct brand for Screen Lock removal, and then click Start.

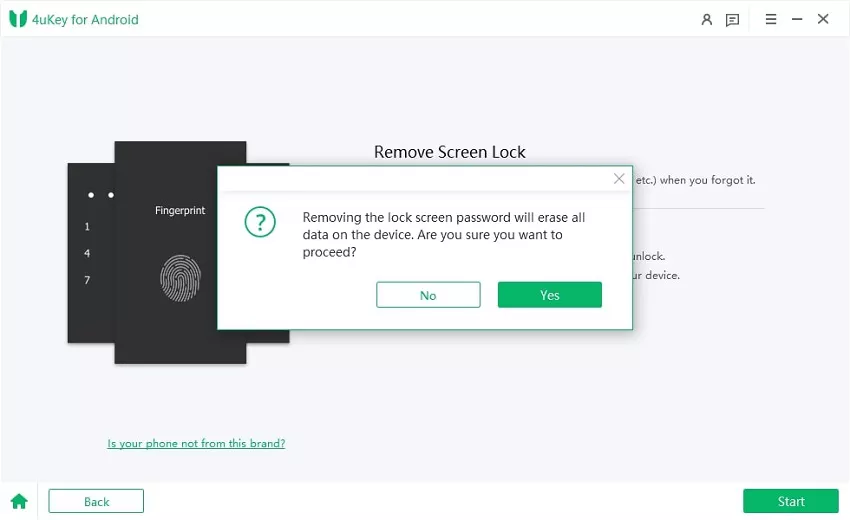
Step 2: Confirm and Remove Lock Screen
Confirm the warning: "Removing the lock screen password will erase all data on the device". If you want to continue, click "Yes", and Tenorshare 4uKey for Android will start removing the lock screen.
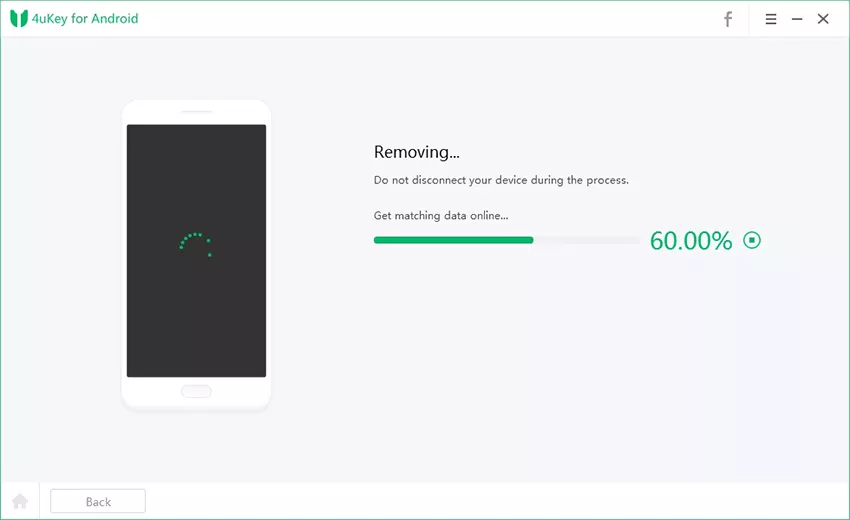
Note: If you are using a Samsung device, the removal process ends at this point. You do not need to follow the steps below.
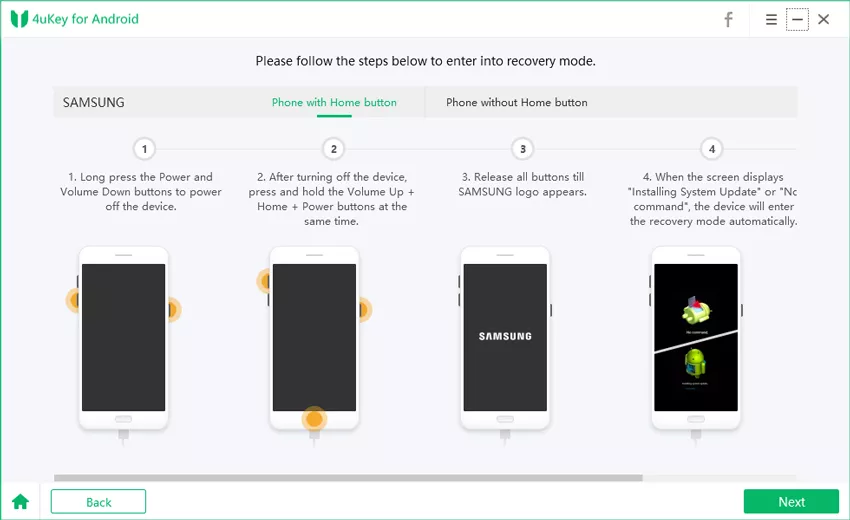
Step 3: Enter Recovery Mode
After the removal process finishes, follow the on-screen instructions to enter recovery mode and perform a factory reset on the Android phone.
Step 4: Screen Lock Removed
Wait for 4uKey for Android to finish removing the lock screen. When the process ends, check the phone screen to continue setup.
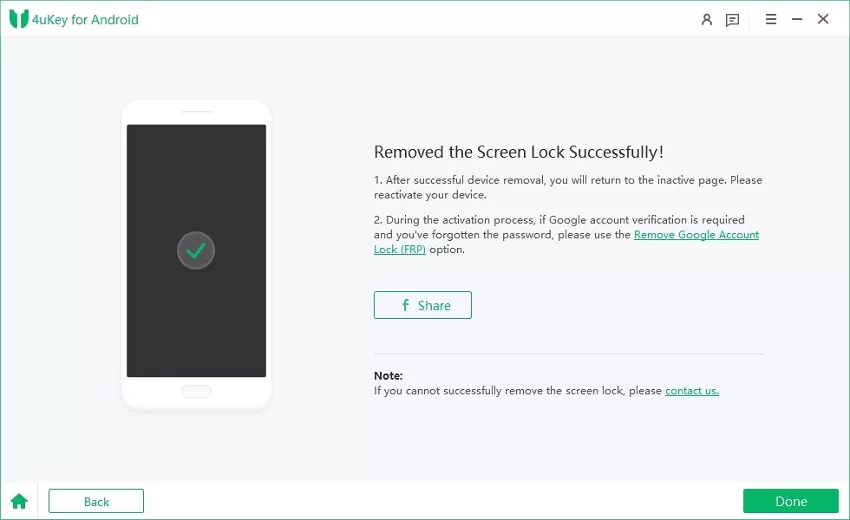
After the workflow finishes, check whether the device can leave DNX and complete Android setup. If it still boots straight back to DNX, treat the problem as firmware, boot partition, driver, or hardware related rather than a lock-screen issue.
Other Fixes for Being Stuck on DNX Fastboot Mode
If the device is stuck at DNX before Android can load, start with non-destructive checks and move gradually toward firmware repair. Each method has a different entry condition, so avoid repeating the same reset attempt without changing the cause you are testing.
Force Restart and Remove Button Pressure
This is for a device that entered DNX after a restart, a low battery event, or accidental button press. Hold Power until the device turns off, remove the case, inspect the volume keys, then turn it on with only Power.
Requirement: working power button and enough battery charge. Data impact: none in normal cases. Fails when: the boot image, system partition, or storage is damaged.
Check USB Cable, Port, and Drivers
This method fits when the device says it is waiting for a fastboot command but your computer does not detect it correctly. Use a direct USB port on the computer, avoid hubs, try another cable, and install the Android platform driver or the driver package from the device manufacturer. Intel-based Android devices may also require Intel or OEM-specific USB drivers.
Requirement: a computer with administrator access and a reliable cable. Data impact: none from driver installation. Fails when: the device has a hardware fault, damaged USB port, or unsupported bootloader state.
Use OEM Firmware or Intel-Based Flashing Tools
If DNX began after a failed update, failed root attempt, or incorrect firmware flash, you may need to reinstall the correct firmware. Use only firmware that exactly matches the model number, region, bootloader requirements, and hardware revision. Brand support pages, official service tools, or authorized repair packages are safer than random firmware archives.
Requirement: exact firmware, correct drivers, stable power, and a tool that supports your device platform. Data impact: firmware flashing often erases all user data. Fails when: the bootloader rejects the image, the firmware is mismatched, the storage chip is failing, or the process is interrupted.
Use Recovery Mode if It Is Available
Some devices stuck near bootloader states can still enter Android Recovery. If you can reach Recovery Mode, you may be able to wipe cache or perform a factory reset from the device menu. A factory reset can remove corrupted user settings, but it will not repair every broken bootloader or firmware partition.
Requirement: a working recovery partition and hardware keys. Data impact: wiping cache is usually non-destructive; factory reset erases user data. Fails when: recovery is missing, corrupted, or blocked by the same boot failure.
Seek Professional Repair
Choose repair service when the device has valuable data, no stable USB connection, repeated flashing failures, or signs of hardware damage. A technician may test the battery, USB port, storage, and board-level faults before attempting low-level reprogramming.
Requirement: proof of ownership may be requested. Data impact: depends on the repair path, but low-level service can still erase data. Fails when: storage is physically damaged beyond recovery or firmware images are unavailable.
Safety, Precautions, and Legal Considerations
DNX Fastboot Mode is powerful because it sits close to the device firmware. Treat it as a repair environment, not a shortcut around security. Only work on a device you own or have clear authorization to service.
- Verify the model first: small differences in region, board, or storage variant can matter during firmware repair.
- Expect data loss: resets and firmware flashing can erase photos, messages, app data, and local files.
- Keep power stable: do not flash with a low battery, loose cable, or unreliable USB hub.
- Avoid unverified packages: unofficial firmware can contain the wrong images or modified boot components.
- Respect account locks: a factory reset does not normally remove Google account verification; use the original account, previous owner, or official support route.
- Warranty may be affected: bootloader unlocking, unofficial flashing, or service-mode repair can affect warranty coverage.
Conclusion
DNX Fastboot Mode means the device is waiting at a low-level boot or firmware communication stage, most often on Intel-based Android hardware. Start with a forced restart and button check, then confirm USB and driver recognition before attempting any reset or firmware operation.
If the issue is tied to a screen-lock reset workflow, a guided tool such as 4ukey-android may help with the lock-removal side, but it is not a cure for corrupted DNX firmware. Persistent DNX loops after failed updates or flashing attempts should be handled with exact OEM firmware or professional repair because the wrong move can erase data or damage the device further.
FAQs
Which Android devices use DNX Fastboot Mode?
DNX Fastboot Mode is most commonly associated with Intel-based Android phones and tablets. Many modern Android devices with Qualcomm, MediaTek, or Exynos chips use different bootloader or download modes instead.
Why does my screen say waiting for fastboot command?
It means the device is in a boot-level state and expects communication from a computer or flashing tool. If you did not enter it intentionally, check for stuck volume buttons, failed updates, firmware corruption, and USB driver problems.
Will exiting DNX Fastboot Mode erase my data?
A simple forced restart does not erase data. Data loss becomes likely when you perform a factory reset, remove a screen lock through a reset workflow, or flash firmware.
Can DNX Mode unlock the bootloader?
DNX Mode itself does not guarantee bootloader unlocking. Bootloader unlock support depends on the manufacturer, model, carrier policy, firmware version, and whether the device exposes an official unlock path.
Can I reboot into DNX Mode with a command?
Some Intel Android builds may support a DNX reboot target through Android debugging, but support is inconsistent and the device must already boot far enough for debugging to work. For most users, the model-specific hardware-key method is more realistic.
Does DNX Fastboot Mode accept normal fastboot commands?
Sometimes, but not always. DNX may appear before the device reaches a standard fastboot interface, so common fastboot operations can fail until the correct driver, platform tool, or OEM flashing environment recognizes the device.
Does a factory reset remove Google account verification?
No. A normal factory reset does not remove Factory Reset Protection. After reset, Android may require the Google account previously synced to the device, or help from the previous owner or official support.